AirTies 4971 – AT&T Smart Wi‑Fi 6 Extender
 Dual-Antenna Range Extender
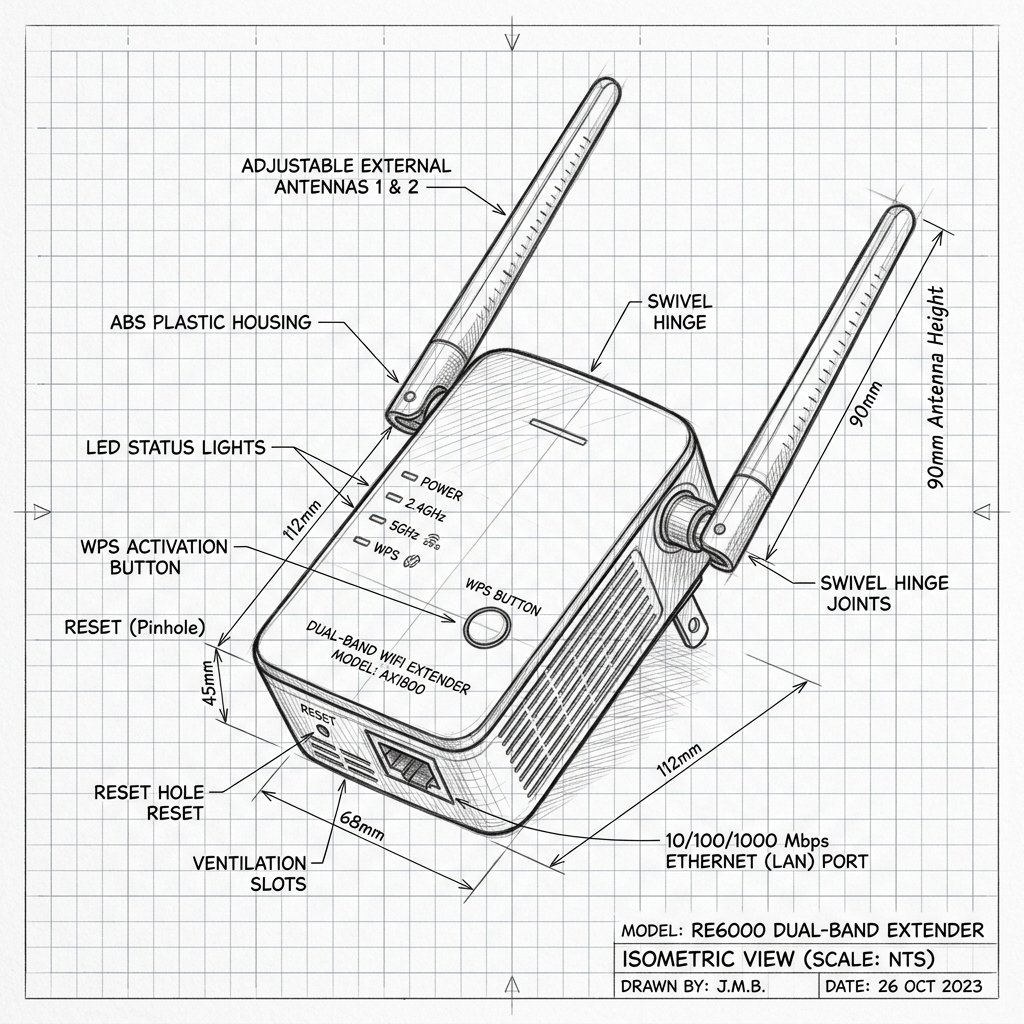
AirTies AirTies 4971 Diagram
Reference this technical blueprint during setup to locate the power input, status LED indicators, one-touch WPS pairing button, and Ethernet port on your device.
The AirTies 4971 is an AT&T-branded tri‑band Wi‑Fi 6 (802.11ax) smart extender designed to work with compatible AT&T gateways and the AT&T Smart Home Manager app. It expands coverage and improves performance on 2.4 GHz and 5 GHz bands while using the exact same network name and password as your main Wi‑Fi gateway.
Quick 3-Step Checklist
- Check service & account: Make sure your AT&T internet is active and your account is eligible/activated for AT&T Extended Wi‑Fi service.
- Verify gateway Wi‑Fi: Confirm Wi‑Fi works properly from your main AT&T gateway before adding any extender.
- Install the app: Download and sign in to the AT&T Smart Home Manager app on your phone or tablet to perform guided setup.
AirTies 4971 Extender Overview
- Wi‑Fi technology: Tri‑band Wi‑Fi 6 (802.11ax) smart extender operating on 2.4 GHz and 5 GHz bands, designed to integrate with AT&T gateways for seamless roaming.
- Compatibility: Intended specifically for AT&T internet customers and AT&T Wi‑Fi gateways. Extenders typically must be activated on an AT&T account with Extended Wi‑Fi service enabled to function.
- Form factor & ports: Desktop unit with status LEDs and Ethernet ports for wired device backhaul or client connections.
Reality Check: Did you buy this used? AirTies 4971 extenders are tightly integrated with AT&T’s internal billing systems. If you bought this device from a third-party seller (like eBay or Amazon) but do not pay AT&T the monthly fee for the "Extended Wi-Fi" service, the gateway may block the extender from pairing. You must have the service active on your account.
Set Up AirTies 4971 with AT&T Smart Home Manager
AT&T requires using the Smart Home Manager app as the primary method to set up and activate your AirTies 4971 extender.
Step 1: Install and Sign In to Smart Home Manager
- On your smartphone or tablet, download the AT&T Smart Home Manager app from your device’s app store or by scanning the QR code printed on the installation box.
- Launch the app and sign in using your myAT&T user ID and password associated with your AT&T internet account.
Step 2: Verify Gateway Status
- In Smart Home Manager, confirm your AT&T gateway is online and Wi‑Fi is active. If the gateway shows offline or has issues, resolve those before installing the extender.
Step 3: Connect the Extender by Ethernet for Initial Pairing
- Place the AirTies 4971 near your AT&T Wi‑Fi gateway for first‑time setup.
- Use the yellow Ethernet cable from the install box to connect a LAN port on the gateway to an Ethernet port on the extender; you should hear a click when each end locks in.
- Plug the extender’s power cable into a working outlet and then into the extender; a green LED near the power port should light, followed by another green LED by the Ethernet port within about 60 seconds.
Step 4: Activate the Extender in the App
- In Smart Home Manager, go to Network and look for Wi‑Fi equipment, then choose the option to add extender or tap the + symbol to add hardware.
- Select the AirTies 4971 extender from the list (by matching its serial number if necessary) and tap Activate extender or follow the on‑screen prompts to complete pairing.
- Wait while the app links the extender to your gateway; the LEDs on the extender should confirm successful activation once pairing is done.
Step 5: Move the Extender to Its Final Location
- After activation, unplug the extender’s power and Ethernet from the gateway and move the extender to a location roughly between the gateway and the area needing better Wi‑Fi coverage.
- AT&T recommends a maximum distance of about 40 feet, two walls, or one floor away from the gateway or another connected extender, and placing the extender up off the floor on an open surface.
- Before plugging the extender back in, you can use Smart Home Manager’s location scan feature: ensure your phone is on the main Wi‑Fi, tap Run scan, and let the app confirm if the spot is good.
- Once you find a good spot, plug in the extender; the back LED should turn green and, within about two minutes, the front LED should become solid white, indicating a successful wireless link to the gateway.
Step 6: Confirm Mesh Network and Test Connection
- In Smart Home Manager, check your extender’s card; a green check mark next to the AirTies 4971 shows it is online and integrated into your network.
- Connect a device in the extended area to your Wi‑Fi (same SSID and password as the gateway) and test internet performance to confirm coverage improvement.
Set Up AirTies 4971 Using WPS (Alternative Method)
On some gateways, you can pair the AirTies 4971 using Wi‑Fi Protected Setup (WPS) without an Ethernet cable, though Smart Home Manager remains the required method for account activation.
Step 1: Place Near Gateway and Power On
- Plug the AirTies 4971 into a wall outlet near your AT&T gateway for initial pairing.
- Wait for the power LED to turn green and the status LED to be ready (usually off or idle white before pairing).
Step 2: Use WPS on Gateway and Extender
- Press the WPS button on your AT&T gateway; its WPS LED should start blinking.
- Within about one minute, press and hold the WPS button on the AirTies 4971 for 3–5 seconds until its LED begins blinking white, indicating pairing mode.
- Allow up to two minutes for the extender to connect; the LED should turn solid white when the WPS pairing succeeds.
Step 3: Move and Optimize Location
- Unplug the extender and move it to a spot between the gateway and the weak area, respecting the recommended distance (around 40 feet, two walls, or one floor).
- Plug in the extender at the new location; once the back LED turns green and the front LED becomes solid white again, the extender has wirelessly reconnected to the gateway.
Warning: Resetting your AirTies 4971 will erase saved pairing information and any custom settings. Always try a simple power cycle (unplug, wait 10–15 seconds, plug back in) before performing a factory reset. If you do a factory reset, you will need to re‑activate the extender through the Smart Home Manager app via the temporary Ethernet connection method.
Quick Fix Checklist
- Confirm AT&T internet and gateway Wi‑Fi are working.
- Verify your account is eligible and activated for Extended Wi‑Fi service (typically $10/mo).
- Use Smart Home Manager to add and activate the extender; confirm a green check mark next to the extender card.
- Place the extender within about 40 feet, two walls, or one floor of the gateway, and run the location scan in the app.
- If problems persist, perform a factory reset and repeat the guided setup, or contact AT&T support for account‑level activation issues.
Placement Tips for Best Performance
- Place the AirTies 4971 halfway between your AT&T gateway and the weak‑signal area, up off the floor on an open surface rather than behind furniture or in a cabinet.
- Avoid interference sources like large appliances, baby monitors, cordless phones, thick walls, and metal cabinets in the immediate vicinity of the extender.
- Use Smart Home Manager’s run‑scan feature to verify that the location is suitable; move the extender as the app suggests until you get a “good” result, then plug it in and wait for a solid white LED.